When you want to be able to drill a screw or bolt into metal, you need to have threads on your fastener and the same thread count (Imperial) or pitch (Metric) as the fastener on the inside of the hole that it’s going into.
The difference between threading and tapping is the surface on which the processes happen. The threading process creates threads on the outside of a fastener, like a bolt, and it’s done with a die tool. The tapping process creates threads on the inside of a drilled hole, and it’s done with a tapping tool.
There are several things to know about threading and tapping, so I’ll cover them below and quickly get you up to speed!
What are Thread Tapping Tools
If you need to be able to thread and tap holes, then you need to pick up some thread tapping tools. If you want to know how to drill and tap a hole, click this link.
How to Drill and Tap a Hole (The Tapping Process/Procedure)
Like I said before, threading creates threads on external surfaces of objects, and tapping creates the threads that are needed on internal surfaces.
Think of threading as the male side of things and tapping as the female side of things. To create the male and female sides of a threaded connection, you need to use the right tools at the right times. Let’s take a look at the most used threading and tapping tools.
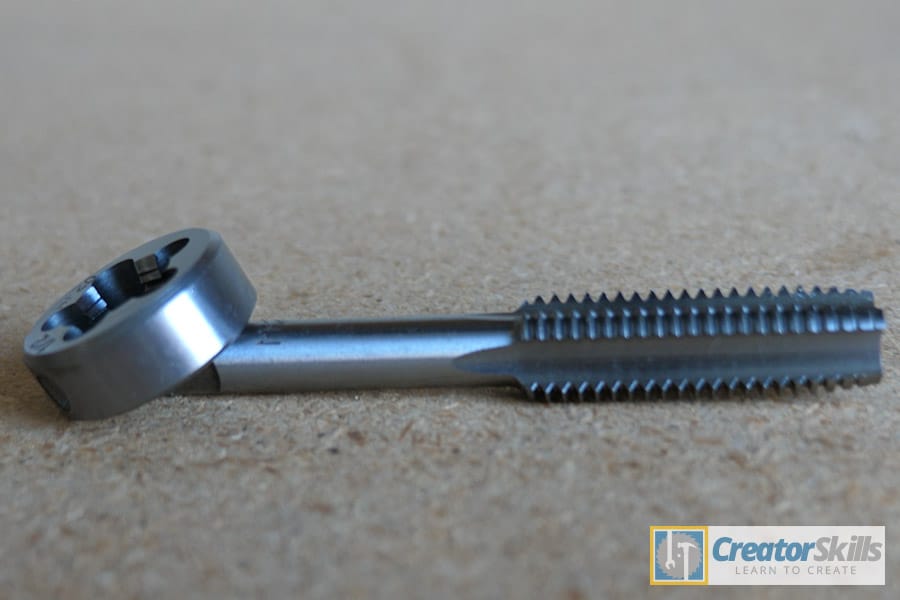
- Tap – A tap is a tool that cuts the internal threads in a pre-drilled hole. It looks like a drill bit. There are three common types: Taper, Plug, and Bottom Taps. I explain these and when to use them in this post. They also come in different sizes, which I’ll cover below.
- Tap Handle – This is the piece that the tapping bit goes into, and you hold on to. It’s pretty much a hand drill.
- Die – A die cuts threads on the exterior of a cylindrical rod-shaped material. It looks like a
- Die Handle – Like the tap handle, this is the handle where the die fits into, and you hold on to it with your hands.
- Thread Gauge – These tools are really handy to have sitting around your shop. They work like a pocket knife, and you hold them up to your screw or bolt to figure what size threads to use. This saves a bunch of time because you don’t have to get a ruler out and measure and count the threads per inch.
- Screw Extractor – A screw extractor removes screws that are damaged to the point where the normal tool that is supposed to be able to remove it won’t work. It’s not really a part of threading or tapping, but they’re good to have around to free up your threads.
Dive Deeper:
Screw, Bolt, and Thread Sizes Explained (For Threading and Tapping)
You will probably come across a time when you have an unidentified screw, bolt, or hole that you need to size up to thread or tap. The exact size is necessary to properly size your fasteners.
Thread sizes follow the normal measurement standards that have been put in place. This means that you have to use a specific size drill bit to drill the correctly sized hole and then use the correct size tap to add the threads. Check out this page for recommended drill and tap sizes for lots of screws and bolts.
There are two main measurement standards for screw sizes in the world. Here in the U.S., we use the U.S. or imperial standard. Everyone else in the world uses the metric numbering standard.
When reading screw size information, the first thing you need to do is determine which of these standards you’ll be using.
Imperial Fastener Sizes
For imperial sizes, the information will either begin with a # sign followed by a number, like #6, or a size in inches, like ¼ or ½. The # is the gauge, and these are smaller sized fasteners than ¼”.
Here is a handy chart to give you an idea about imperial fastener sizes.
| Gauge Number or Diameter | Diameter Decimal Equivalent |
| 000 | 0.0340 |
| 00 | 0.0440 |
| 0 | 0.0600 |
| 1 | 0.0730 |
| 2 | 0.0860 |
| 3 | 0.0990 |
| 4 | 0.1120 |
| 5 | 0.1250 |
| 6 | 0.1380 |
| 8 | 0.1640 |
| 10 | 0.1900 |
| 12 | 0.2160 |
| 1/4 | 0.2500 |
| 5/16 | 0.3125 |
| 3/8 | 0.3750 |
| 7/16 | 0.4375 |
| 1/2 | 0.5000 |
| 9/16 | 0.5625 |
| 5/8 | 0.6250 |
| 11/16 | 0.6875 |
| 3/4 | 0.7500 |
| 13/16 | 0.8125 |
| 7/8 | 0.8750 |
| 15/16 | 0.9375 |
| 1 | 1.000 |
Metric Fastener Sizes
For metric sizes, your information will usually start with the letter M, which is really clever… The basic metric fasteners don’t need a chart because the number after the M is just the diameter specified in millimeters. So M6 would be a 6-millimeter diameter, and M12 is a 12-millimeter diameter. These are the most common sizes that you’d see at your local hardware store. There are more complex metric standards, but I won’t get into those right now.
Some standard bolts you’d see at Home Depot would look something like ¼” – 13 TPI x 3″ or M8-1.25 x 30mm. If this seems confusing, don’t worry…just continue reading, and it’ll make more sense.
How to Read Standard and Metric Screw, Bolt, and Thread Size Callout Information
When reading specs on plans for screw size callouts, it will probably look a little different than just the standard bolt callouts on the little bins at Home Depot, because you will need to know a bit more information to thread and tap your parts properly.
Here are the standard specifications to know when it comes to threading, tapping, and fasteners.
- Major Diameter – This is the outside distance of the threads. Think of the peak of a mountain.
- Minor Diameter – This is the inside distance of the threads. Think valley.
- Thread Pitch – The thread pitch is the distance between threads, and is usually determined by threads per inch.
- Thread Series – This is the threading standard to use for determining how many threads per inch or pitch. A lot of times, people will just drop the U and just say NF or NC to make things easier.
- These are the most common thread series types
- UNF Fine – More threads per inch ½ – 20 UNF
- UNC Coarse – Less threads per inch ½ – 13 UNC
- Other not so common thread series types
- UNS – Special
- UNEF – Extra Fine
- UN – Constant Pitch
- UNJ – Rounded Root
- These are the most common thread series types
- Thread Class – The tolerance of how good the threads fit together.
- Class 1 – Loose
- Class 2 – General Purpose
- Class 3 – Tightest Fit/Precision
- A – External thread for a screw or bolt.
- B – Internal thread on a hole or a nut.
- Length – This is the total distance of the fastener.
- Thread Direction – Left-Handed or Right-Handed (LH or RH).
- Most threads are right-hand threads because that is the standard. Think about the saying when you were younger…Lefty loosey righty tighty.
Usually, if you don’t see a thread direction specified, it is just a right-handed thread. If you see an LH in the specs, then you know it’s a left-handed thread.
Left-handed threads are useful to keep fasteners in place when on a rotating object, like on one side of your bike pedals. If both sides of your pedals were normal right-handed threads, the friction on one side would slowly back out the threads of your pedal, and it would keep falling off.
Thread Callout Notation Examples
- Imperial – ½ -20 UNF 2A
- ½ – The major diameter in inches – ½ inch thick
- 20 – Thread pitch – 20 threads per inch
- UNF – Thread Series – Fine
- 2 – Thread Class – Class 2
- A – External thread – Usually for screw or bolt
- Metric – M4 x 1.5 x 30
- M – Means metric
- 4 – Major diameter in millimeters
- 1.5 – Thread pitch in millimeters
- 30 – Length of the fastener in millimeters.
Confusing Things About Screw and Bolt Sizes
There’s so much to know when it comes to threading, tapping, and fasteners that I could write for pages and pages. It can get pretty confusing. What commonly happens among people who don’t work in the trades for a living is they get metric, imperial, and gauge sizes mixed up.
They see #8 on a screw, and either they don’t know what it is or think it’s just the metric size 8 millimeters. There is a #8 gauge size drill bit that is a different size than the #8 screw too.
Also, say you have a ¼ -20 bolt and you need to drill and tap a hole into some metal. What size drill bit should you use to pre-drill your hole? You can’t just use a ¼ drill bit. It has to be smaller to account for the threads that you’re going to create, but it can’t be too small to let the inner portion of the bolt inside of the hole.
You have to find a tap drill chart like this one to figure out the right size drill bit to use. It’s easy once you know a few main threading and fastener concepts, and I think I covered some of the main things that you might want to know.
How to Determine or Measure Thread Sizes
If you need to figure out how to determine or measure thread sizes, you can use one, or all of these three easy methods.
- Ruler Method – Get a ruler and see how many threads are in 1 inch.
- Gauge Method – Get a thread (Imperial) or pitch (Metric) gauge and test.
- Trial and Error Method – Use a known size fasteners or holes and test.
I’ll explain more on how to use them below, but right now I want explain why I said to use one or all three methods to measure your threads.
Mistakes happen when you’re working in the shop. Sometimes they can be really costly. When dealing with thread sizes, you want to make sure that you are 100% positive that you have the correctly sized pieces, because bad things could happen if you don’t.
You might not have the right parts, miss your deadline, or even ruin your work by adding the wrong size threads. I can’t stress it enough…Always check your work!
Now that I got that out of the way, let’s move forward with the thread measuring methods.
Ruler Method
The first method uses a ruler, and it’s pretty simple. You just line up the start of the ruler on one of the thread peaks (not the valleys) and count the number of thread peaks that are in one inch. The only hard part about this is if there are a lot of threads. Sometimes they’re really tiny, and you get confused when you’re counting. Maybe that’s just me…
Gauge Method
The second method is a little easier, but you have to get your hands on a special gauge to test your threads. The gauge works like a pocket knife with little blades with teeth that correspond to the thread size. You open one blade, put it up to your threads, and see if the teeth of the blade line up to the threads on your fastener or hole.
If the gauge does line up, celebrate! You’ve found the correct thread size. If the blade teeth don’t match the threads, then close the blade, open the next one, and test again until you find your match. This can take some time, and sometimes the imperial and metric thread sizes are really similar, so make sure you take your time and test things properly. Once I find my match, I like to double check and use a bolt or nut of the size I think it is and see if it screws in correctly.
Trial and Error Method
The third method is to skip the fancy gauge altogether and use spare nuts and bolts to test the threads. This only works if you know the thread size of your spare nuts and bolts. If you didn’t know the thread size, you’d just know that the threads match up, and you’d still need to figure out the size of both threads.
This method can be handy, though…If you’re trying to figure out the thread size of a tapped hole that’s in or on a big part that can’t be lugged into Home Depot, then find a bolt that fits the hole. Once you have your match, take the tiny, and easy to move, bolt to Home Depot and find the properly sized nut that matches. I know…I know…You might be thinking that this is a pretty bootleg way to measure threads. It is and it isn’t.
You have to work with the tools you have or can get your hands on, and sometimes you have to keep making progress on your projects no matter what. Using the trial and error method to measure threads isn’t the most efficient method, but it can save you when you’re in a pinch!
- Bootleg Method Pro Tip – When you find your matching nut, double, triple, and quadruple check to make sure all of the nuts in the bin work with your bolt.
What sometimes happens at Home Depot and other stores is people test parts out and throw the wrong parts into the wrong bins, which can really mess you up and cause a lot of confusion. Always check a few times with a handful of what should be the same nut, just to be on the safe side.
Threading and Tapping Conclusion
I hope I explained the difference between threading and tapping good enough so you can explain it to your friends to sound super smart. If I didn’t, or you want to know about something else, please let me know in the comments below, and I’ll try to clear it up!