A coping saw is a handy tool to have in your workshop. Many people don’t know what a coping saw is or how it’s used.
So, what is a coping saw? A coping saw is a small hand saw that is used to make very intricate and delicate cuts usually for moldings and other fine woodworking applications. Its blade can also be removed to make interior cuts that other saws aren’t able to make.
A coping saw has a ton of applications, and there’s a lot to know about what seems like a simple tool. I’ll explain more below so you can quickly get up to speed on such a useful saw.
What is a Coping Saw Used For
A coping saw is most commonly used for creating coped joints on inside corners of molding, like baseboard and crown molding. A properly cut coped joint creates a much tighter joint than a traditional mitered joint with a miter saw because each joint can be individualized.
In a perfect world, walls of a square or rectangular room are supposed to be at 90 degrees. In the real world, walls end up being something different, like 89 or 91 degrees. Out of square walls may be because the house has shifted a little, or it was just poor construction from the beginning. No worries though…a coping saw and a little elbow grease can make your molding look perfect!
Other uses for a coping saw are smaller and more precise cuts that would be too clunky for other saws. I’ve used a coping saw to create dovetail joints for things like a box or cabinet drawer. Using a router is much faster for dovetail joints, though. I’ve also used a coping saw for making tiny cuts out of a pinewood derby car.
A coping saw can also be used to cut metal, and it can get into spots that other saws can’t get into because of its design.
What is a Coped Joint
A coped joint in woodworking is when two surfaces, usually the inside corners of molding, are fitted together by cutting the shape of the molding out of only one of the pieces. The other piece of molding can be cut at a 90-degree angle (for a square or rectangular room) and butted up to the wall. The coped piece is usually cut at a 45-degree angle, and then the detailed shape of the molding gets almost traced by the coping saw.
A lot of carpenters just use a traditional mitered joint for molding because of how quickly it can be accomplished. A coped joint takes a little more time but can make your work look much more professional. Either way, paint, and caulk can hide most imperfections in molding!
What Does a Coping Saw Look Like
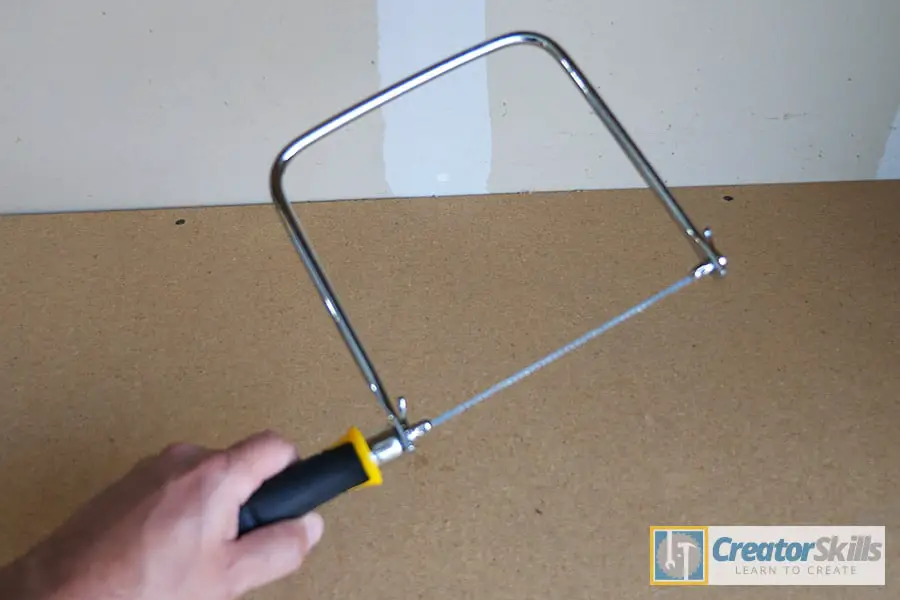
A coping saw looks like a bow or a C-clamp. Its frame is usually constructed out of metal and is shaped like a big c. The depth of the C allows the saw to get into places that other saws can’t get to, like molding that is over 4 inches tall.
The blade of a coping saw is really thin, with little sharp teeth, which allow it to make tight curves very easily. The blade can also be removed from the coping saw. A common use of removing the blade is to create an interior cut, which otherwise, wouldn’t be possible.
The blade of a coping saw also needs to be changed every so often because it gets dull, just like every other saw blade.
The handle is just like a screwdriver handle, but a coping saw’s handle can be unscrewed to release the blade. Some coping saws have wood handles, and some have a plastic or rubber handle for more grip. The handle tighter you screw in the handle, the more tension you have in the blade, which makes it easier to cut.
Which Way Should the Teeth Face on a Coping Saw Blade
The teeth of a coping saw blade should face the handle, which means that the saw mostly cuts while you’re pulling rather than pushing the blade. Having the proper blade direction helps when using your coping saw.
Other saws have the teeth facing away from the handle because they’re designed to cut on the push stroke.
Also, one of the coolest things about a coping saw is that you can rotate the blade inside the saw. Turning the blade allows you to get into different spots and use it in ways that other saws can’t be used for.
Typically, the blades on hand saws face down, but with a coping saw, you can have the blade face whatever way you want…left, right, and even up!
How to Use a Coping Saw
A coping saw is just like any other hand saw. You put your blade on the edge of your workpiece and pull and push a bunch of times until you’re finished. Here are some tips to help you out when using your saw.
- When starting your cut, it’s easier to make a few pull cuts first, to stabilize your blade. If you just start pushing and pulling, your blade wanders around because the sides aren’t “locked in” to the cut by the sides of the wood.
- Before you start, try to clamp your work, if possible. Properly securing your work allows you to use both hands on the saw, which gives more control and better cuts.
- While cutting, don’t force things. Let the blade do the actual cutting. If you use too much force, your blade can bend or break, and you’ll have rough and wavy cuts.
To make an interior cut with a coping saw, like a circular hole cut out of a square, start by drilling a small hole in your workpiece. The size of the hole needs to be bigger than the width of the blade. Remove the coping saw blade from the saw by unscrewing the handle and place the blade through the small drilled hole. With the blade inside and through the hole, attach it back to the coping saw and tighten the handle. Now you can cut a precise interior cut without having to saw into the middle of your workpiece.
A coping saw can also cut metal if you use the correct blade (High tooth per inch like 20+), the metal isn’t too thick, and you have a lot of patience. I’d probably use a hacksaw though, depending on if it could get into the same spots as a coping saw. The hardness of the metal and the thin blade of the coping saw can result in wavy cuts that are hard to control. I also like to use my time in better ways!
Common Coping Saw Problems
- Cuts Are Wavy – If your cuts are wavy, try clamping your work for stability. Make sure the blade has a lot of tension by tightening the handle as much as you can, and slow down.
- Blade Not Cutting – If your blade isn’t cutting, try changing the blade to a sharper one or change to a different tooth count (See below).
- Blade Seems Loose – If your blade is loose, tighten the handle by spinning the coping saw’s handle.
- Blades Keep Breaking – If your blades keep breaking on your coping saw, try using less force and be more controlled with your cuts. Again, slowing down with a saw is never a bad thing.
Coping Saw Safety
As always, a coping saw is a tool and should be used with the proper safety precautions. Below are some tips and tricks to keep you safe while using your coping saw.
- Clamp Your Work – As mentioned earlier, not only does clamping your workpiece down help improve the accuracy of your cut, it also reduces the chance of you accidentally cutting yourself by slipping while you’re using your coping saw.
- Inspect Coping Saw – Before using a coping saw, give it a once over to make sure it’s ready to be used. Make sure you have the proper blade for your job and make sure it’s sharp. Also, tighten the handle, so your blade has the correct amount of tension.
- Don’t Touch the Teeth of the Saw – This seems like a no brainer, but I’ve found myself thinking about just holding the coping saw blade like a piece of dental floss to speed up my cuts. THIS IS A BAD IDEA. Your fingers will end up slipping along the blade, and you’ll find yourself with a little less blood than when you started.
- Wear Safety Glasses – I’ve found that little shards of wood or metal can fly off your work in the weirdest directions, with a crazy amount of force while using a coping saw. Protect your eyes at all costs and put on a pair of safety glasses.
- Depth of Material – Since the blade of a coping saw is really thin, it’s not designed to cut through really thick materials. Try to keep the cut less than 1 inch thick. Cutting a 4×4 with a coping saw is a bad idea!
- Wear Gloves – If you find yourself getting splinters or small pieces of metal in your fingers while working, slap on a pair of thick work gloves to keep your digits safe.
- Replace Blade – If your coping saw isn’t cutting as fast as you’d expect, it might be because the blade is dull, or it’s the wrong blade for the cut or material. Using a dull or wrong blade can cause you to use excessive force, which could break your material or coping saw and it’s blade. Change the blade to a lower tooth per inch blade (Maybe 10-15 TPI) to speed things up. If you need a really fine cut, try using a coping saw with 20-32 TPI.
Coping Saw Conclusion
Hopefully I’ve answered all your questions about a coping saw. It’s unique design allows it to get into those hard to reach spots. It’s also a really handy tool that can be a real lifesaver when making precise cuts.
As always, if you have any questions or comments, reach me in the section below!